
Thursday, July 19, 2012
Thursday, May 17, 2012


Part 4 of Friendship Medallion

Now on to Part 5!
Sunday, April 1, 2012

This is the inner block of a Friendship Medallion quilt that I am working on. It's a free pattern from Patchwork Pumpkin. It's designed to make you use up your scraps and not buy new fabric. They will send you one round and then you have to send them a picture of the finished section to get the next part. I'm loving it.
You can get the pattern at Patchwork Pumpkin from Australia. I can't get the link to work so just go to patchworkpumpkin.com.au
Saturday, March 31, 2012
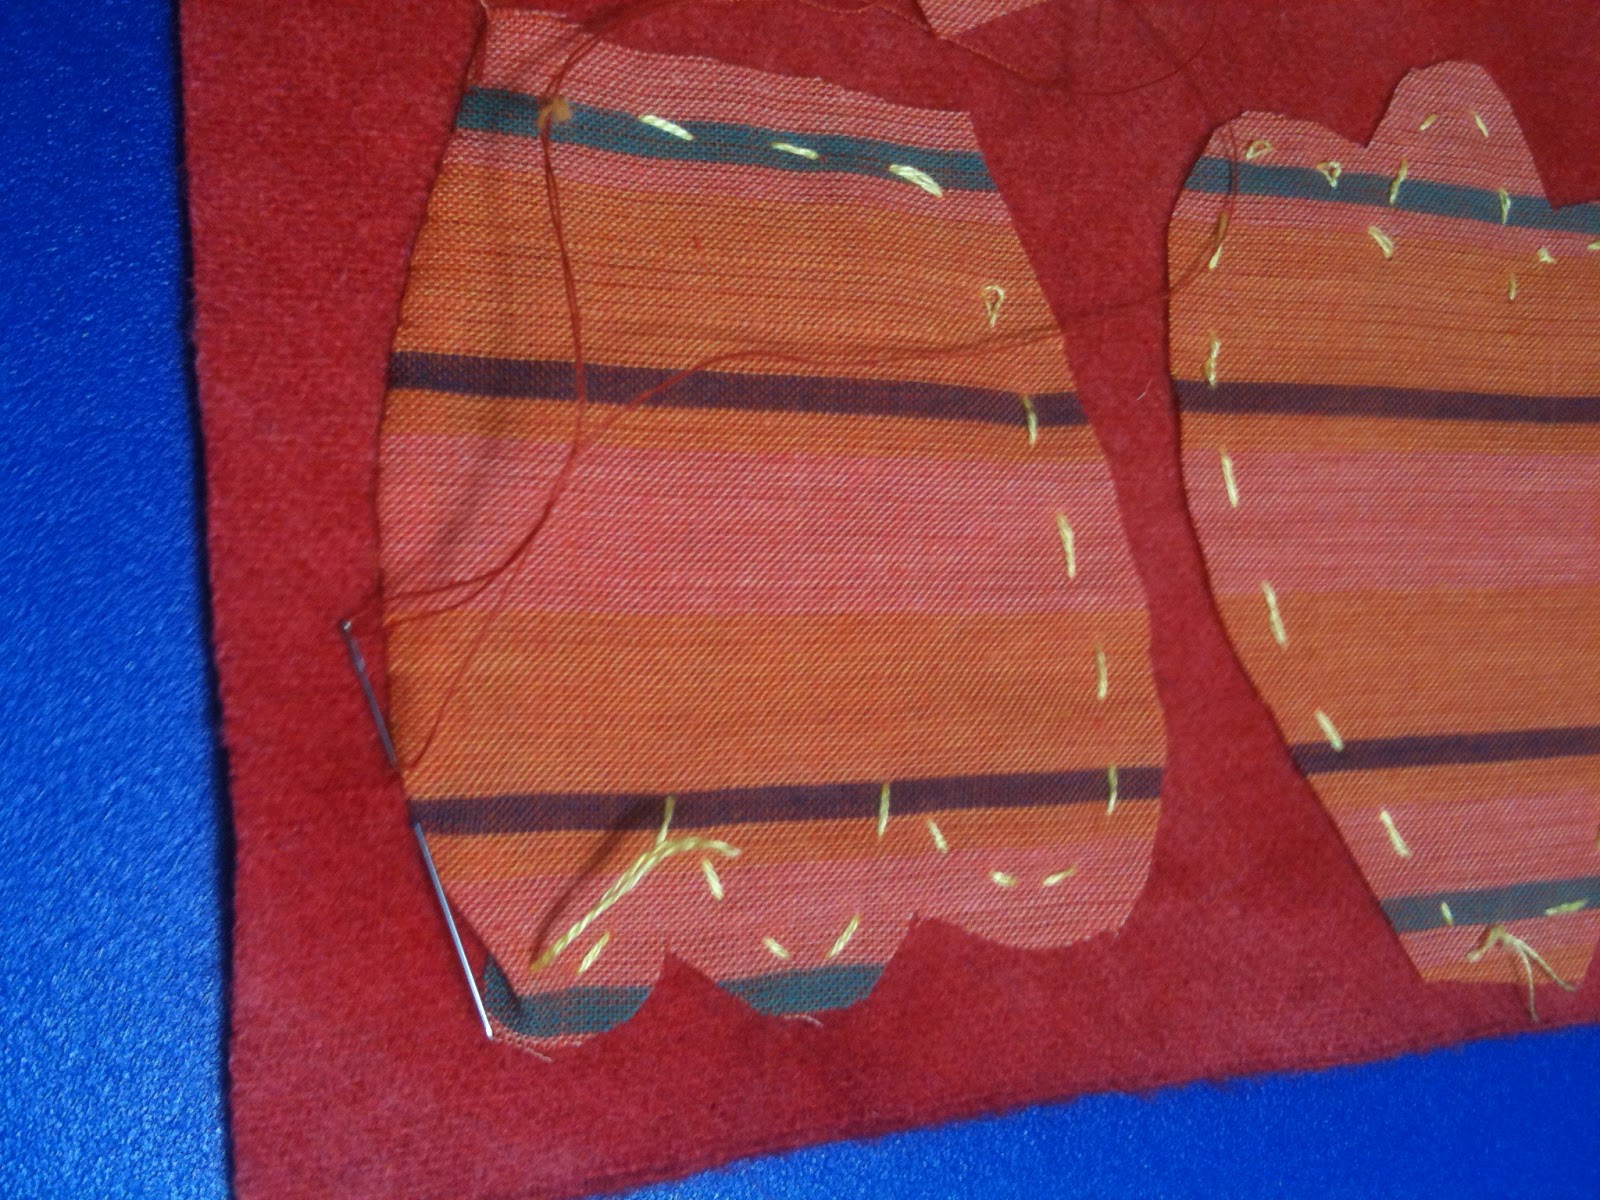
I am working on the Sue Spargo BOM for 2011 (I haven't started 2012 yet, but it looks wonderful) and I was really having a hard time getting the cotton appliqued onto the wool and having it come out as nice as I want it to be.
Since I'm used to the back-basting method of applique I was having a heck of a time figuring out how to get the pattern on there, since you can't put wool on a light box and trace around a pattern.

I first drew the pattern onto freezer paper and cut it out. Then I pressed it onto the cotton fabric, which was pinned to the wool background. Then I stitched around the freezer paper with floss, same as I would have done with back-basting it from the back. I just "front-basted" it.


I don't know if these pictures are in exact order, but I'm sure you get the idea. Now I just had to applique those pieces and then cut the wool behind them to the right size. It worked great and I've already used this method on something else I was working on.
Since I'm used to the back-basting method of applique I was having a heck of a time figuring out how to get the pattern on there, since you can't put wool on a light box and trace around a pattern.

I first drew the pattern onto freezer paper and cut it out. Then I pressed it onto the cotton fabric, which was pinned to the wool background. Then I stitched around the freezer paper with floss, same as I would have done with back-basting it from the back. I just "front-basted" it.
Then I removed the freezer paper, and trimmed 1/4" (or less) around the stitching, just as I would have done with back-basting.


I don't know if these pictures are in exact order, but I'm sure you get the idea. Now I just had to applique those pieces and then cut the wool behind them to the right size. It worked great and I've already used this method on something else I was working on.


Then I cut the squares out of that piece of fabric. Trimmed from one side, turned, and then trimmed the other side to get the size I needed. It worked great. Frustrations over!
Subscribe to:
Posts (Atom)